Master Document
Summary
11/13/2024 Read time: 8 min
A Master Document is a detailed flight plan and a working record of your flight. It is required when crossing the NAT, verifies you're on track and burn, provides a backup dead-reckoning means of navigation, and is your primary evidence for showing an inquisitive inspector you know what you're doing over the ocean.
Hand-in-glove with the Master Document is your oceanic plotting chart. These two documents are what you engage with during the crossing to verify and record your progress. There are both paper and electronic options for Master Documents and plotting charts.
Details
Remember your primary flight training - your first cross country- and all the planning involved. Paper charts you had to strategically fold and ensure were up to date. A mechanical, circular calculator, because nothing screams aviator like spinning a whiz wheel - one hand on the wheel, one on the yoke. And the navigation log with detailed calculations of courses, headings, times enroute, and fuel burns - produced by hand, mind you.
This is not much different from how some flight departments execute oceanic crossings today—even in top-of-the-line long-range aircraft! Paper plotting charts, awkwardly folded and marked up, and printed 100+ page briefing packages are still standard.
The tide is changing, and paperless solutions are becoming more mainstream. Like in your primary training (if you are old enough to have used paper charts), this walkthrough will start with the paper and then give the shortcuts and electronic solutions for a Master Document and plotting chart. Several electronic options exist. This walkthrough utilizes Foreflight Active Navlog; you can find links to others at the end.
Paper Version
Don't worry; no calculations by hand are required. As previously discussed, Foreflight Dispatch is your friend, even with paper. For this example, our flight is in a PC-12:
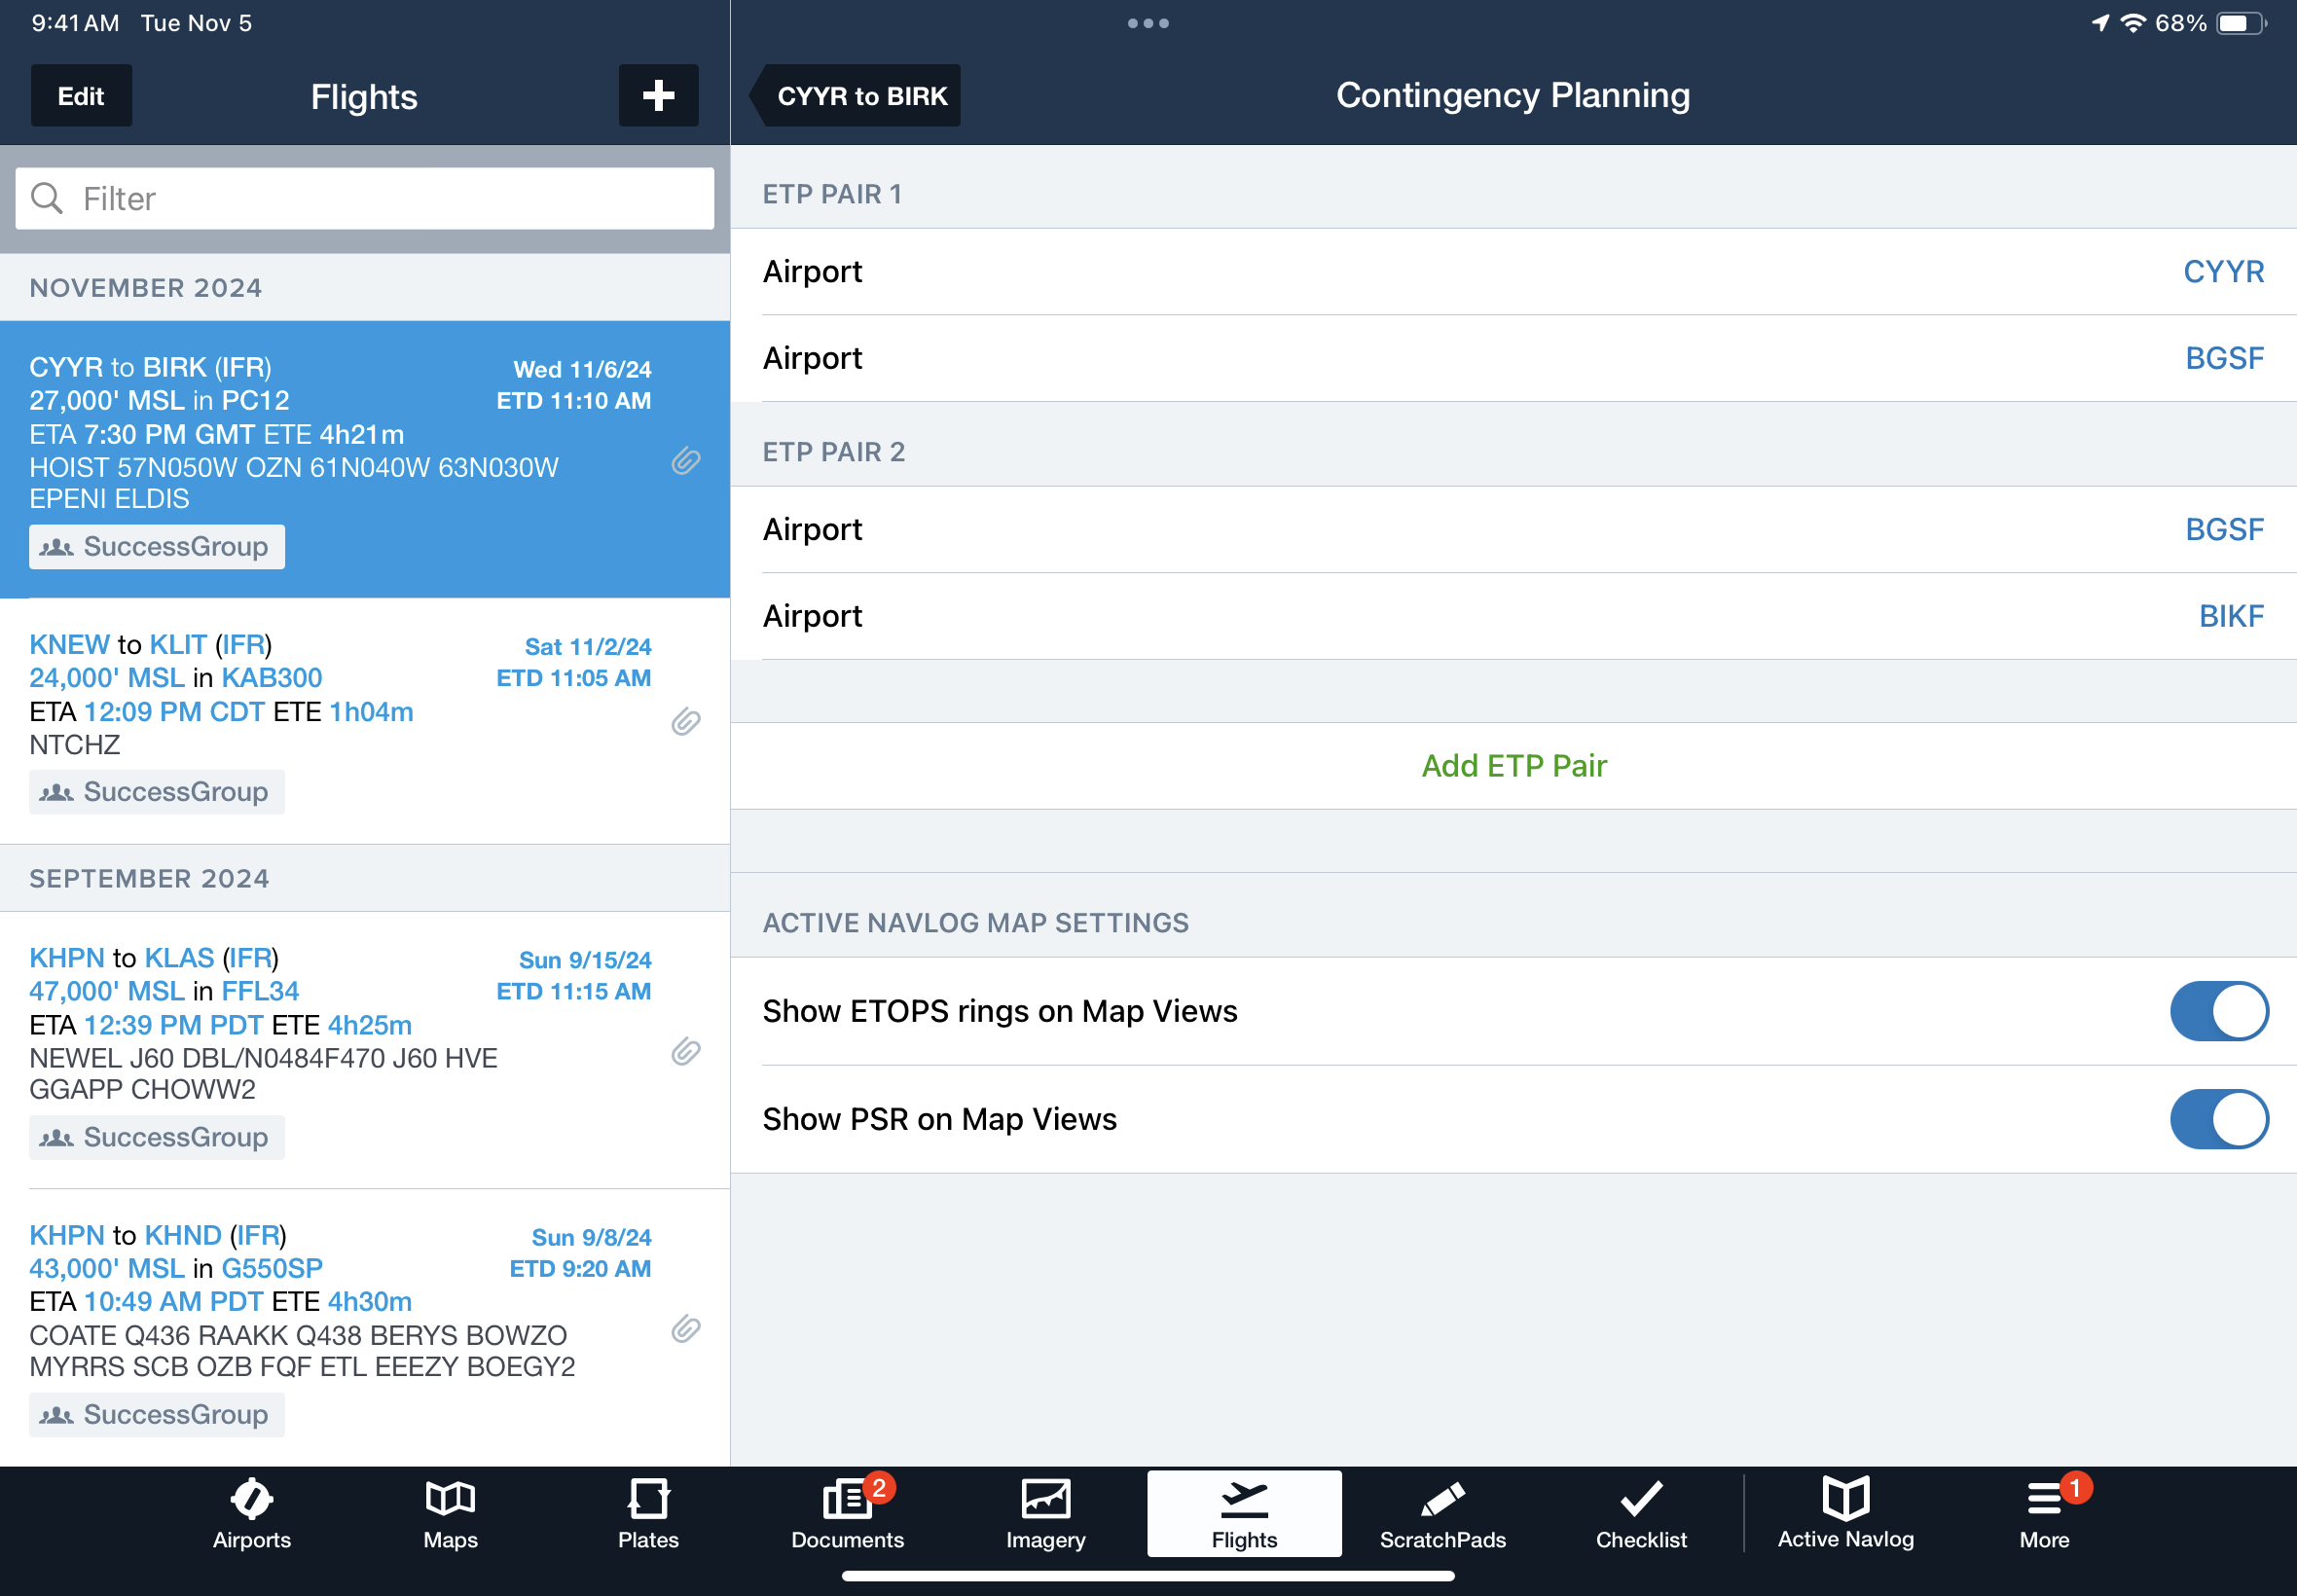
CYYR to BIRK
Filed via HOIST 57N050W OZN 61N040W 63N030W EPENI ELDIS
FL270 @ 265 knots
ETP city pairs: CYYR - BGSF and BGSF - BIKF
The four core documents to have are:
NavLog sample produced by Foreflight Dispatch.
Plotting chart: Jeppesen plotting chart
Communications Log (not required but helpful if new to position reports)
Briefing Sample produced by Foreflight Dispatch - digital copy stored in Foreflight.
Before takeoff
ATC will give you your domestic and oceanic clearances on the ground at coastal airports. If you had the range to overfly, you would have to pick up the oceanic clearance separately in the air.
At CYYR, it's a simple call to ground. Record the ATIS and clearance received on your NavLog.
If you didn't get a clearance matching what you filed, update the NavLog (and re-print) to match.
Once you get your clearance, load it in your FMS/flight plan and verify it with your NavLog. Standard procedures are for one pilot to load the waypoints and checkmark each waypoint as they are loaded and track and distances are confirmed.
Once loaded, plot your route on the plotting chart. The second pilot independently verifies the work and circles each waypoint on the Navlog as it matches the FMS and plotting chart.
If there is only one pilot, collapse the two steps into one and circle the waypoints once they have been plotted and verified.
Review how to input lat/longs into your FMS. A PC-12 with Honeywell has the format N57W050. ARINC shorthand exists for some other FMS systems, and in the North Atlantic, the format for the same waypoint would be 5750N. When you verify the lat/long, look at the expanded form for accuracy. The ARINC shorthand changes depending on your location in the world, here is a key:
Additionally, record an altimeter check on the NavLog or comm log and verify RAIM for the flight. RAIM is a predictive GPS coverage check that can be performed within your avionics. Foreflight automatically checks for you and details the results in your NavLog.
If the tracks are in your vicinity, plot them on your Jepp plotting chart to see where other traffic will operate. Knowing where the tracks are won't matter much if you're flying under them (below FL290). If you're above the tracks, you mustn't descend through them, even in an emergency, so it's more critical to map them.
Next, plot your ETPs and label them. An important note: don't add the ETPs to your FMS as a waypoint in your flight plan.
Finally, once you have a clearance, the communication log can be prefilled with the waypoints.
Departure to OEP
Record your block out and time of departure on the NavLog.
On your way to the OEP, it's business as usual with domestic ATC, in this case, Gander Center. Before the OEP, call Gander Radio to give them an estimate. Gander Center can give you the frequency to call Gander Radio.
"Gander Radio, N12345 on 133.425."
Once acknowledged,
"N12345 Estimating HOIST at 2000z, FL 270, 265 knots, negative HF."
Your estimated time needs to be +-3 min, so wait until you are in cruise at speed before giving an estimate. If it is wrong, no worries; call Gander Radio to update. Once you reach the OEP you are expected to fly your assigned speed through the NAT region unless you request otherwise.
When they reply, they will give you a primary and secondary frequency and instructions for your position report:
"Over HOIST, contact Gander Radio on 133.425 Primary, 127.675 Secondary."
Record your estimated time and frequencies on your NavLog or communications log if you use one. If you have HF radios, the process is the same, except you will be given HF frequencies.
Crossing waypoints
Over HOIST and subsequent oceanic waypoints, the process is the same. As you overflight, fill in the NavLog with data: Fuel remain, fuel used, Actual Time Enroute (ATE), Actual Time of Arrival (ATA), and any remarks. Verify you're over the correct waypoint (via GPS coordinates) and cross through HOIST on the NavLog.
Next, it's time for your first position report - this is where the comm log shines. You already prefilled it with the waypoints; now add the times crossed and ETA for your next waypoint. The comm log is your script for talking with Gander.
"Gander Radio, N12345 on 133.425, Position." ‘
----
"Gander Radio, N12345 Crossed HOIST, Time 2000z, FL270, Estimating 57N050W At 2045z, Next OZN."
Note that the text in parentheses in the below comm log is your script verbatim. Your estimated time should be +-2 min. Gander Radio will give you another set of primary and secondary frequencies and instructions to contact radio again over the following waypoint. In this case, it's still Gander Radio over 57N050W.
Once in oceanic airspace, you can SLOP right of course up to 2.0nm. See here for details.
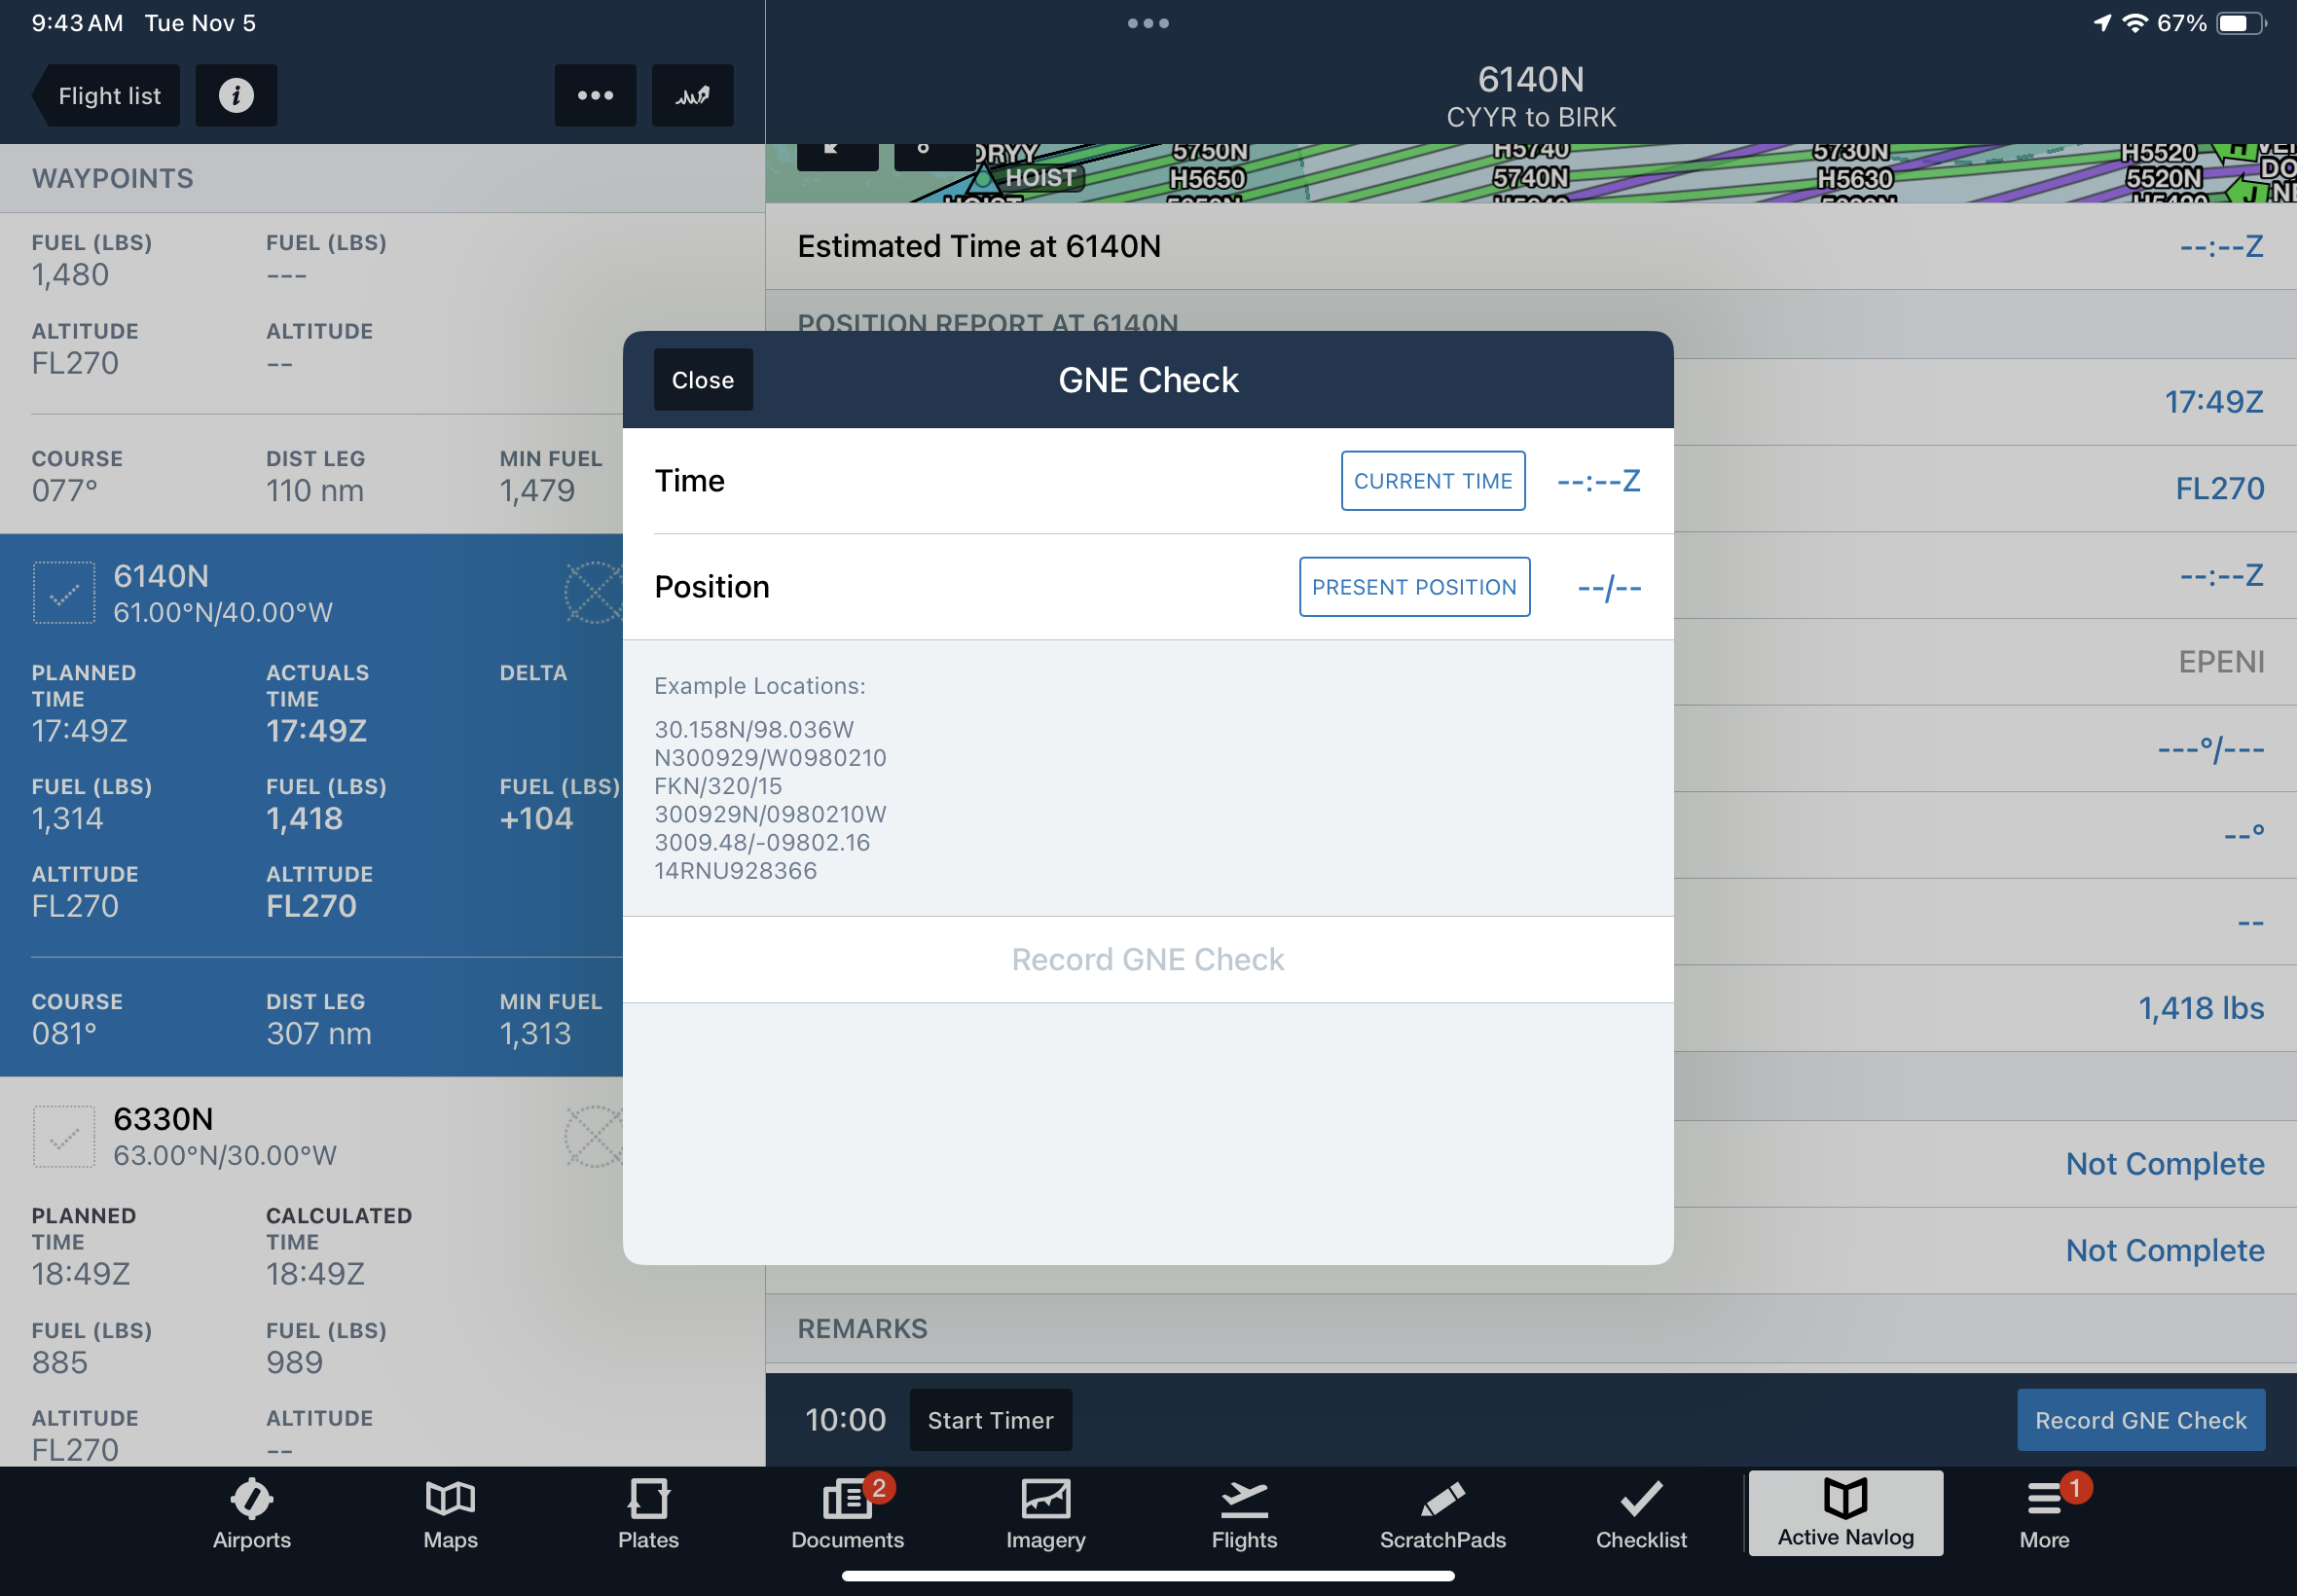
Ten minutes after crossing the waypoint, complete a Gross Navigation Error (GNE) check. This is to make sure you’re on course to the next waypoint. Plot your lat/long on your plotting chart, and cross through HOIST on the NavLog again to record that the GNE check is complete. Ten minutes into oceanic airspace, remember to squawk 2000.
Complete an altimeter check on either the comm or NavLog every hour. Watch your fuel burns to ensure you'll make your destination, and monitor when you cross your ETPs in case of diversions.
OXP to Landing
The above process continues until exiting oceanic airspace. Once you reach EPENI, you will switch from Iceland Radio and oceanic procedures to Reykjavik control and domestic operations.
East of Greenland, altimeter settings switch from inHG to hPa. And since you're fiddling with the settings, change your radios from 25kHz to 8.33kHz; you'll need it once you reach Europe.
Postflight paperwork
On arrival, record your landing time, block-in time, and fuel remaining. For six months after the flight, retain the plotting chart, NavLog, Comm log (if used), and the Foreflight briefing log.
While the NavLog is considered the official Master Document, it's generally understood that all these documents together compose a complete crossing record.
Unplanned stuff
Reroutes and weather deviations happen. Both can fudge your times. Remember, one main point of this whole exercise is to be able to dead-reckon if you lose your GPS. On the NavLog are headings, courses, and distances. In the worst-case scenario, you can still complete the crossing with these values if you get GPS spoofed or have avionics failure.
If rerouted, you will need to calculate the new distance, groundspeed, time, and burns. You may actually need a wiz-wheel! GLHF. If you re-mark up your NavLog and plotting chart accordingly, it will be messy. All is not lost. Even without internet, Foreflight can provide course and distance. Armed with winds (NavLog and Briefing), you can estimate ground speed and times. And if all else fails, the Track function on autopilots can point you in the right direction.
Foreflight Active NavLog
Now, a better way.
Active NavLog records all the above data. No paperwork or manual plotting is required. Now that you have a general idea of what goes into Master Documents and plotting, consider upgrading to paperless. Foreflight's complete walkthrough can be found here. I’d highly recommend getting the full 1-hour rundown.
Here are a few extra tips:
Wait to start the Active NavLog for a flight until the data in your Flights tab and your clearance match. It's easier to modify the route in Flights than in Active NavLog.
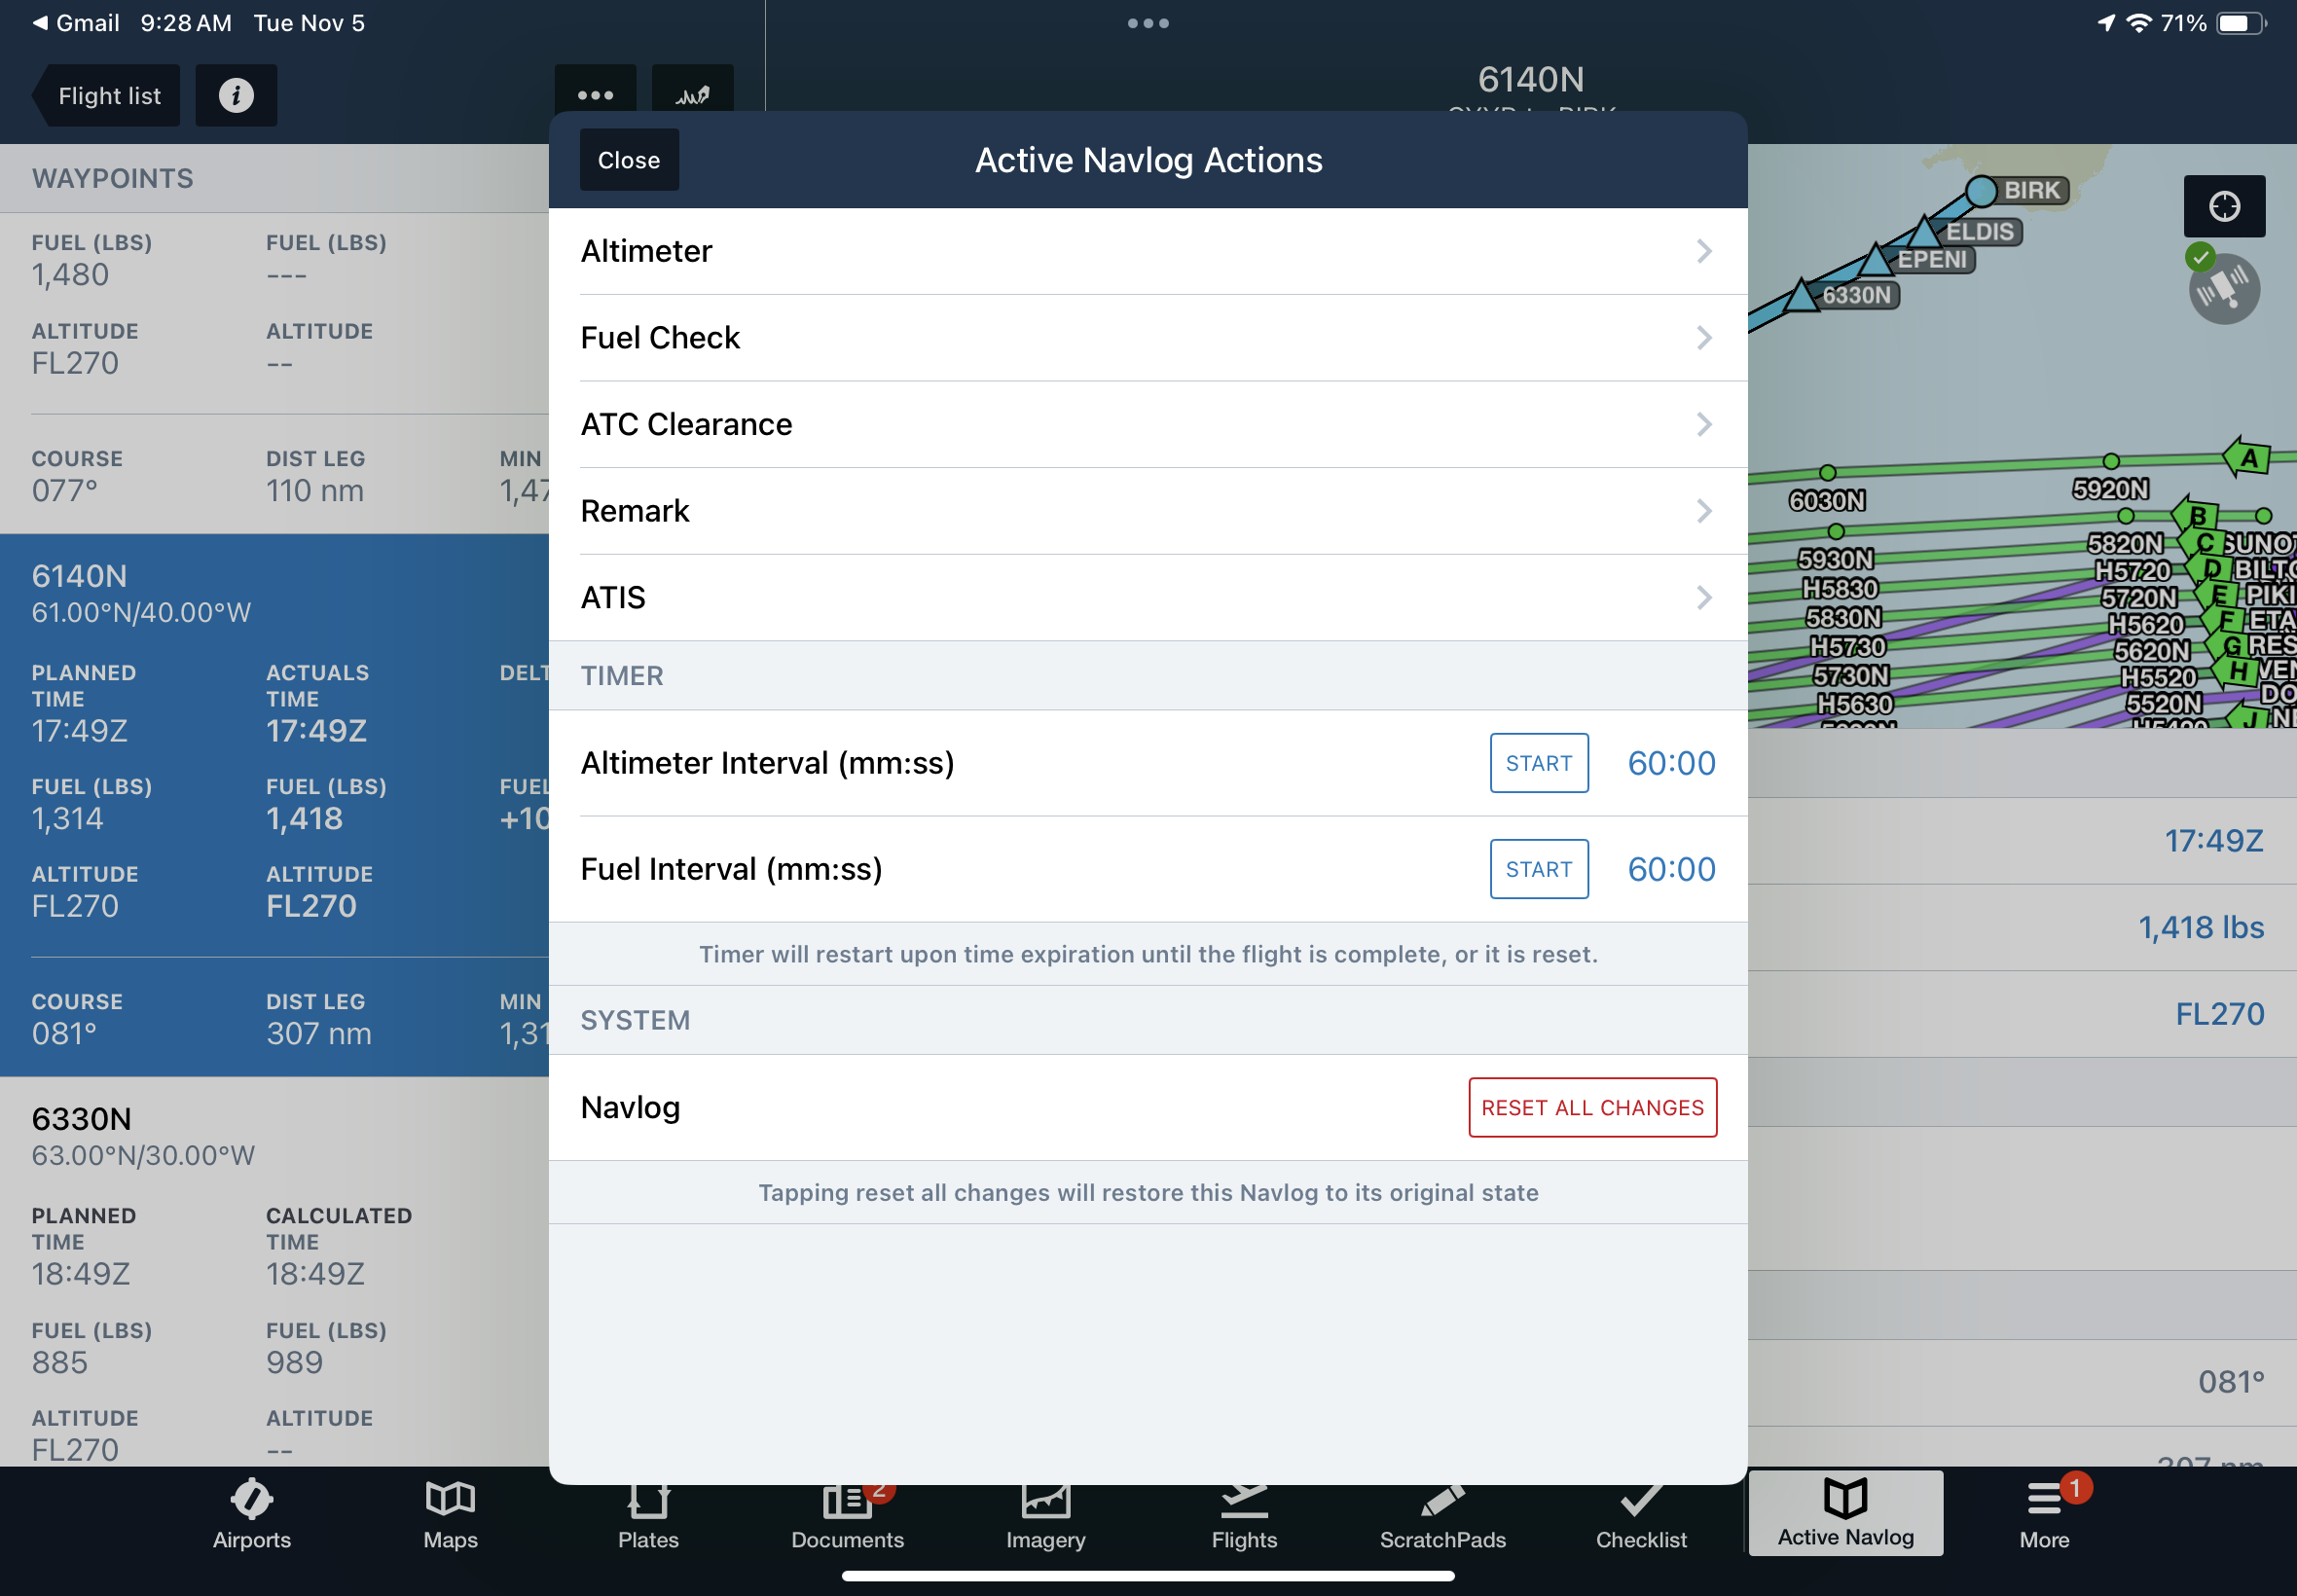
The triple dot menu near the top left contains Active NavLog Actions applicable to the whole flight instead of a specific waypoint. And right next to that is a signature button to lock the data in postflight.
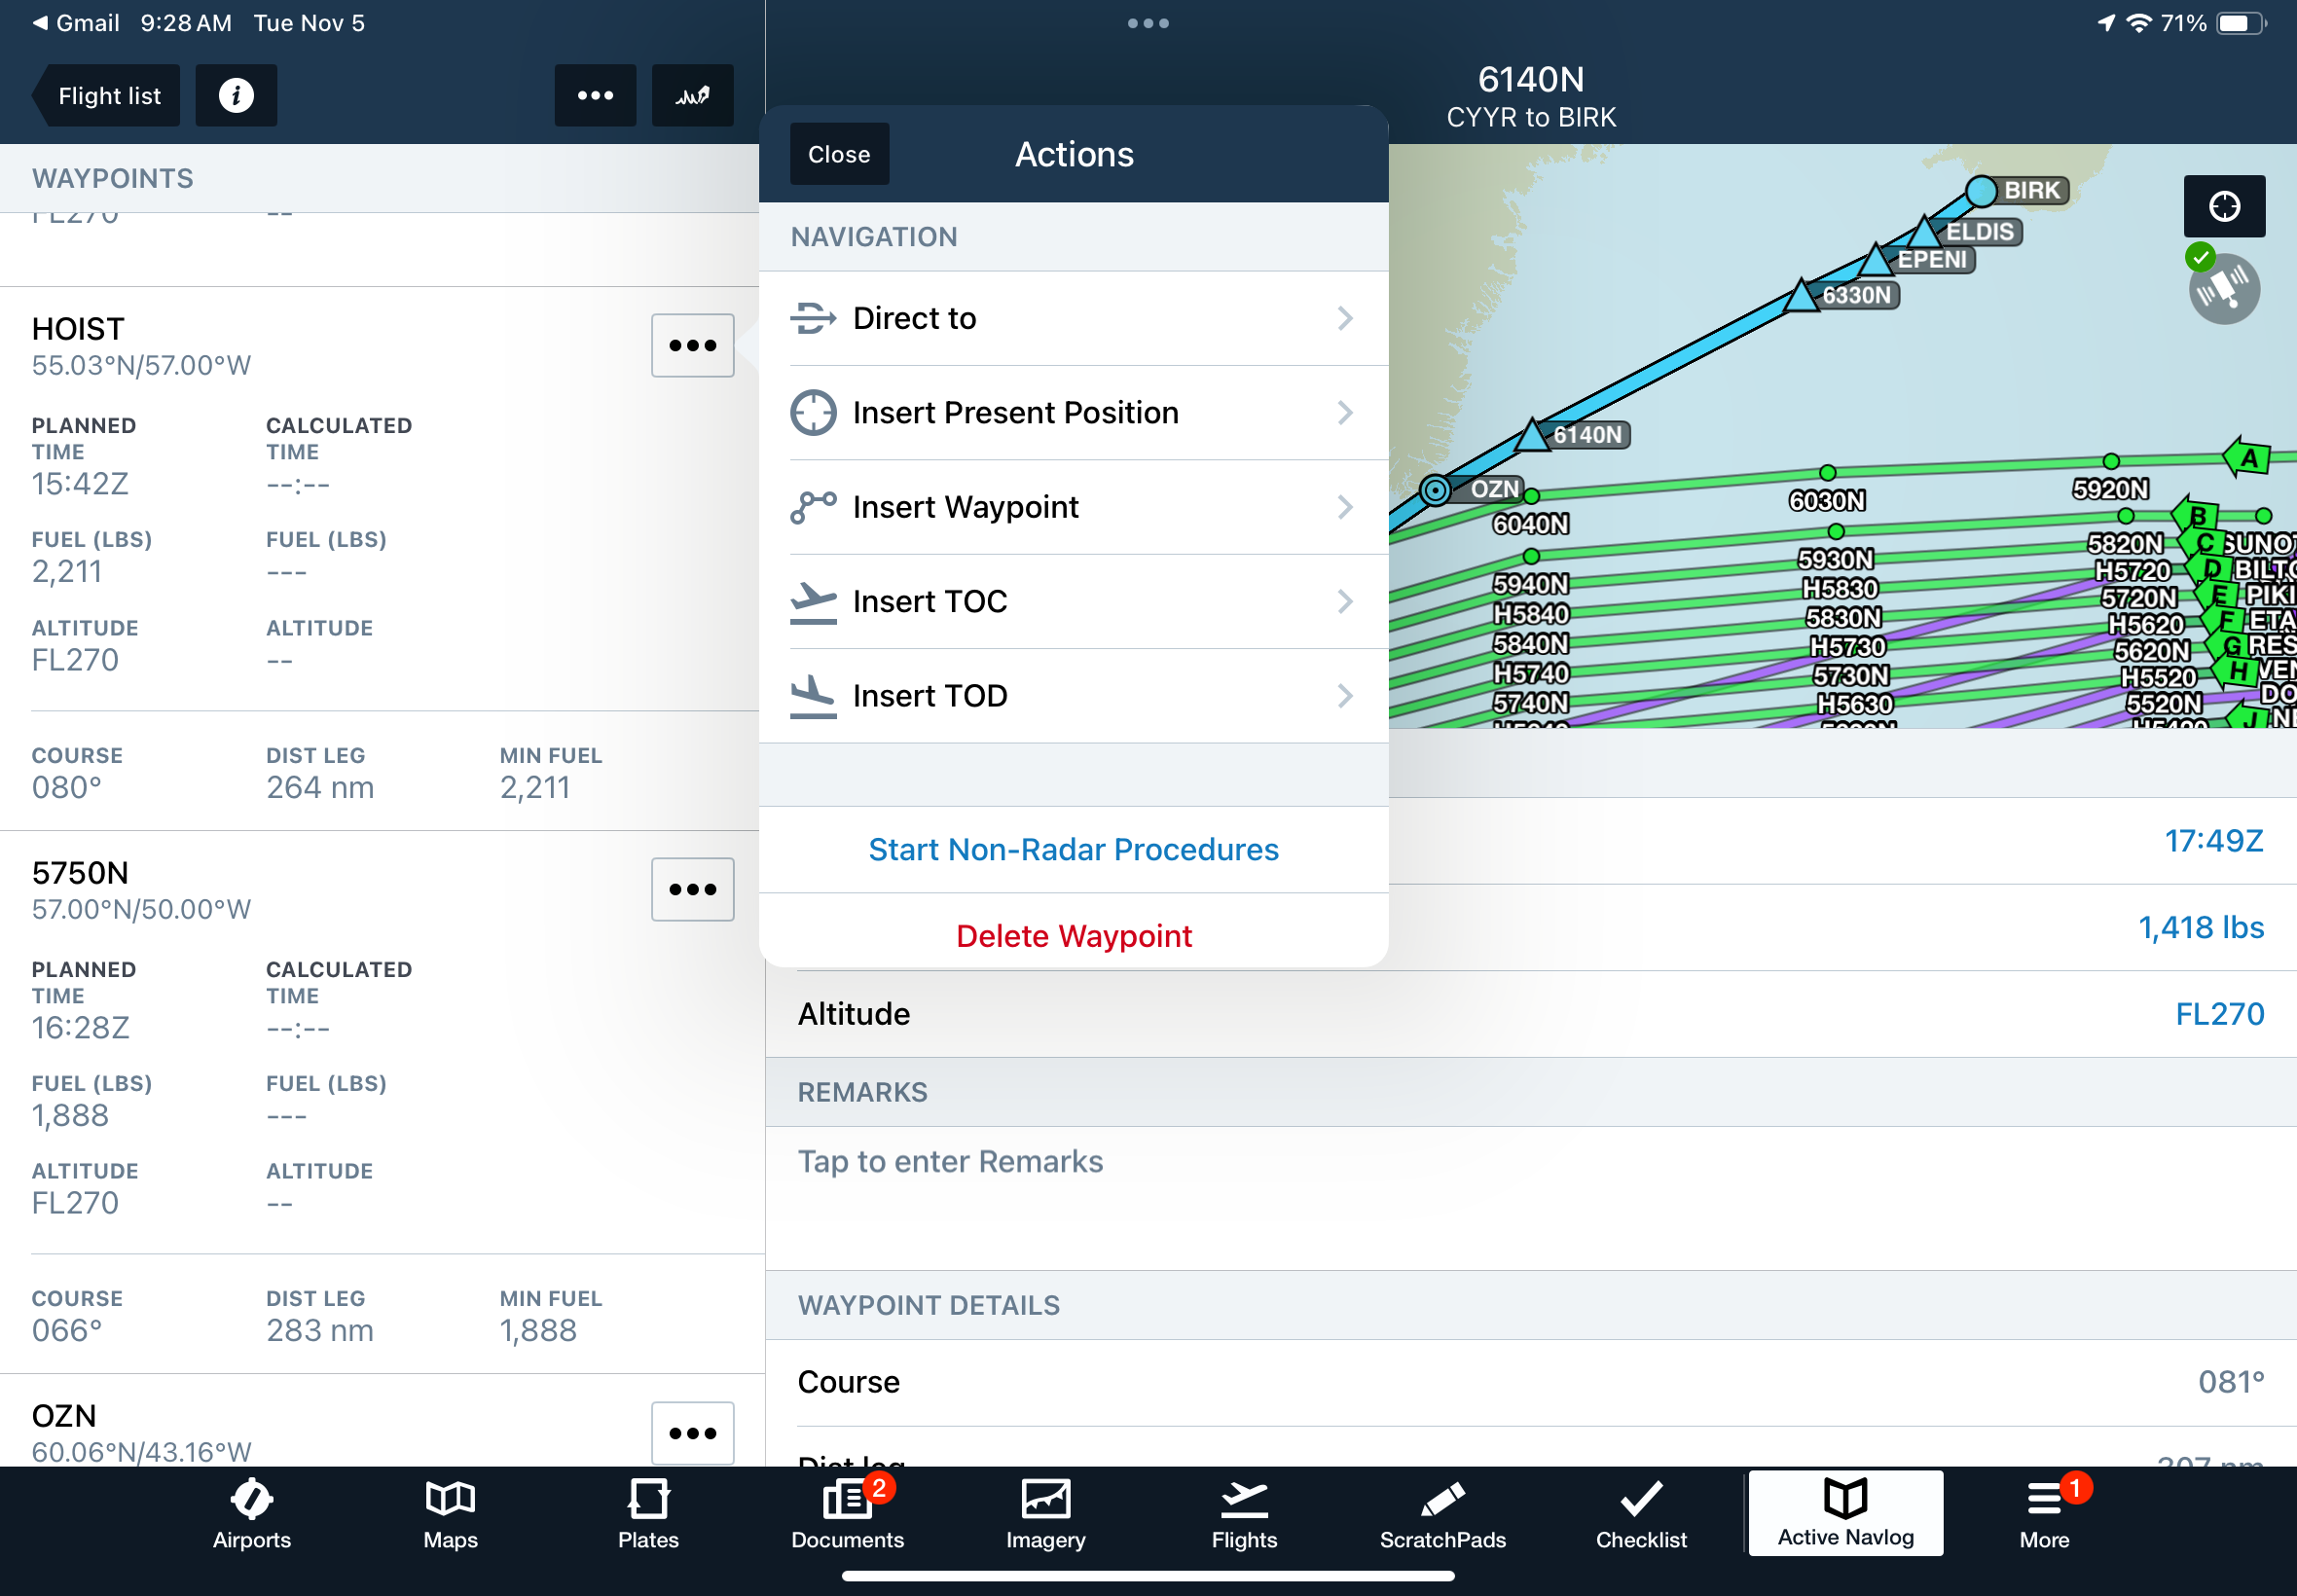
Activating "Start Non-Radar Procedures" is how you access the check, circle, and cross-throughs of waypoints.
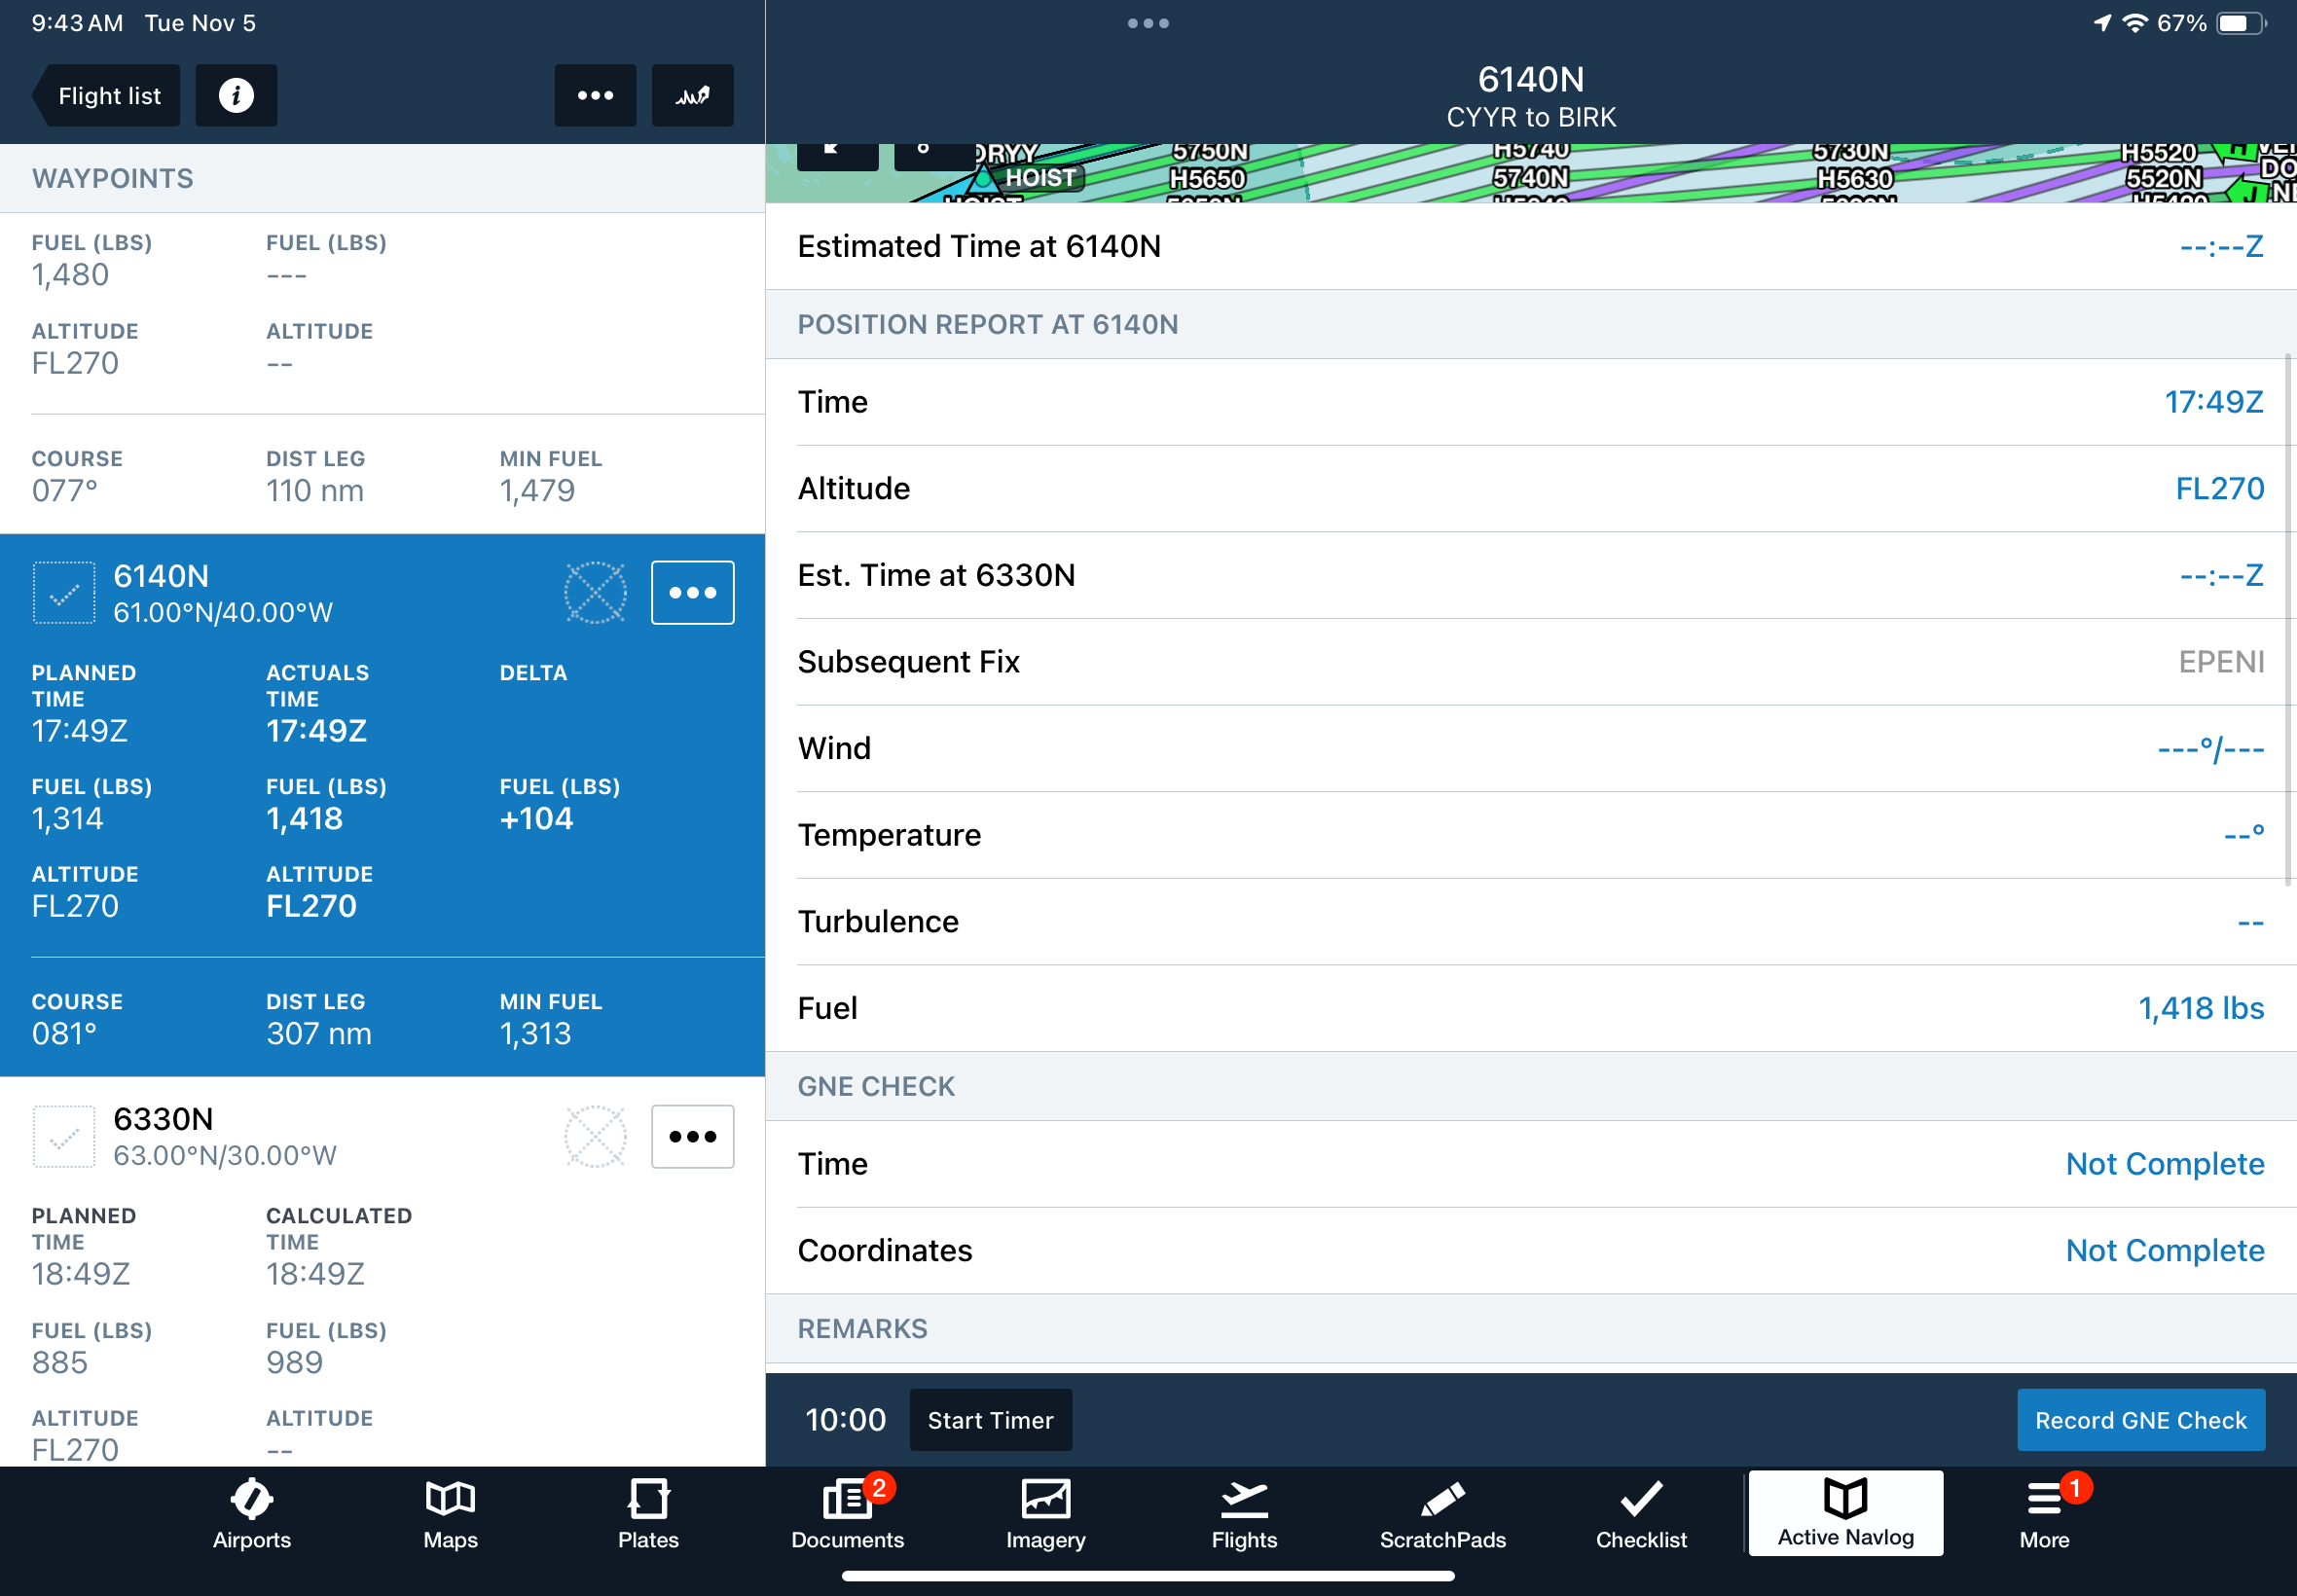
The data displayed for each waypoint, under POSITION REPORT, follows the order of a verbal position report like the comm log. Note the check, circle and slash symbology over the 6140N waypoint once you start non-radar procedures.
ETPs and PSRs are configured in the Flights tab of Foreflight and then displayed on the Active NavLog map. You can tap to view the exact lat/long and other diversion details.
One of the best functionalities is the GNE checks. A built-in timer can notify you when to complete the check. Postflight, the GNE checks appear on the completed Active NavLog - map, lat/long, and time.
Watch the Foreflight walkthrough and poke around the app before taking it across the ocean. It’s a great tool, but you still need to be familiar with navigating the platform.
Aviate
Practice inserting lat/longs and NDBs into your FMS/flight plan.
Consider a Foreflight Dispatch Subscription with Active NavLog for your operation.
Watch the Foreflight Active NavLog Video Walkthrough.
Purchase a Jeppesen Plotting Chart—It is good to have anyway, and it contains a lot of additional information.
Explore other electronic plotting options: Scott Plot, ARINC Direct Plotting, and PlotNG.


